 OS University™
Integrations Overview
Module: Settings • Image Guide
Overview
The Integrations page is the connection center for your account — where you connect outside platforms and accounts to your OS account. Go to Settings → Integrations to connect, manage, reconnect, troubleshoot, or disconnect supported integrations like Google, Facebook & Instagram, Google Business Profile, QuickBooks, TikTok, Shopify, Zoom, Outlook, and more.
Step-by-Step Instructions
Step 1: Open Integrations
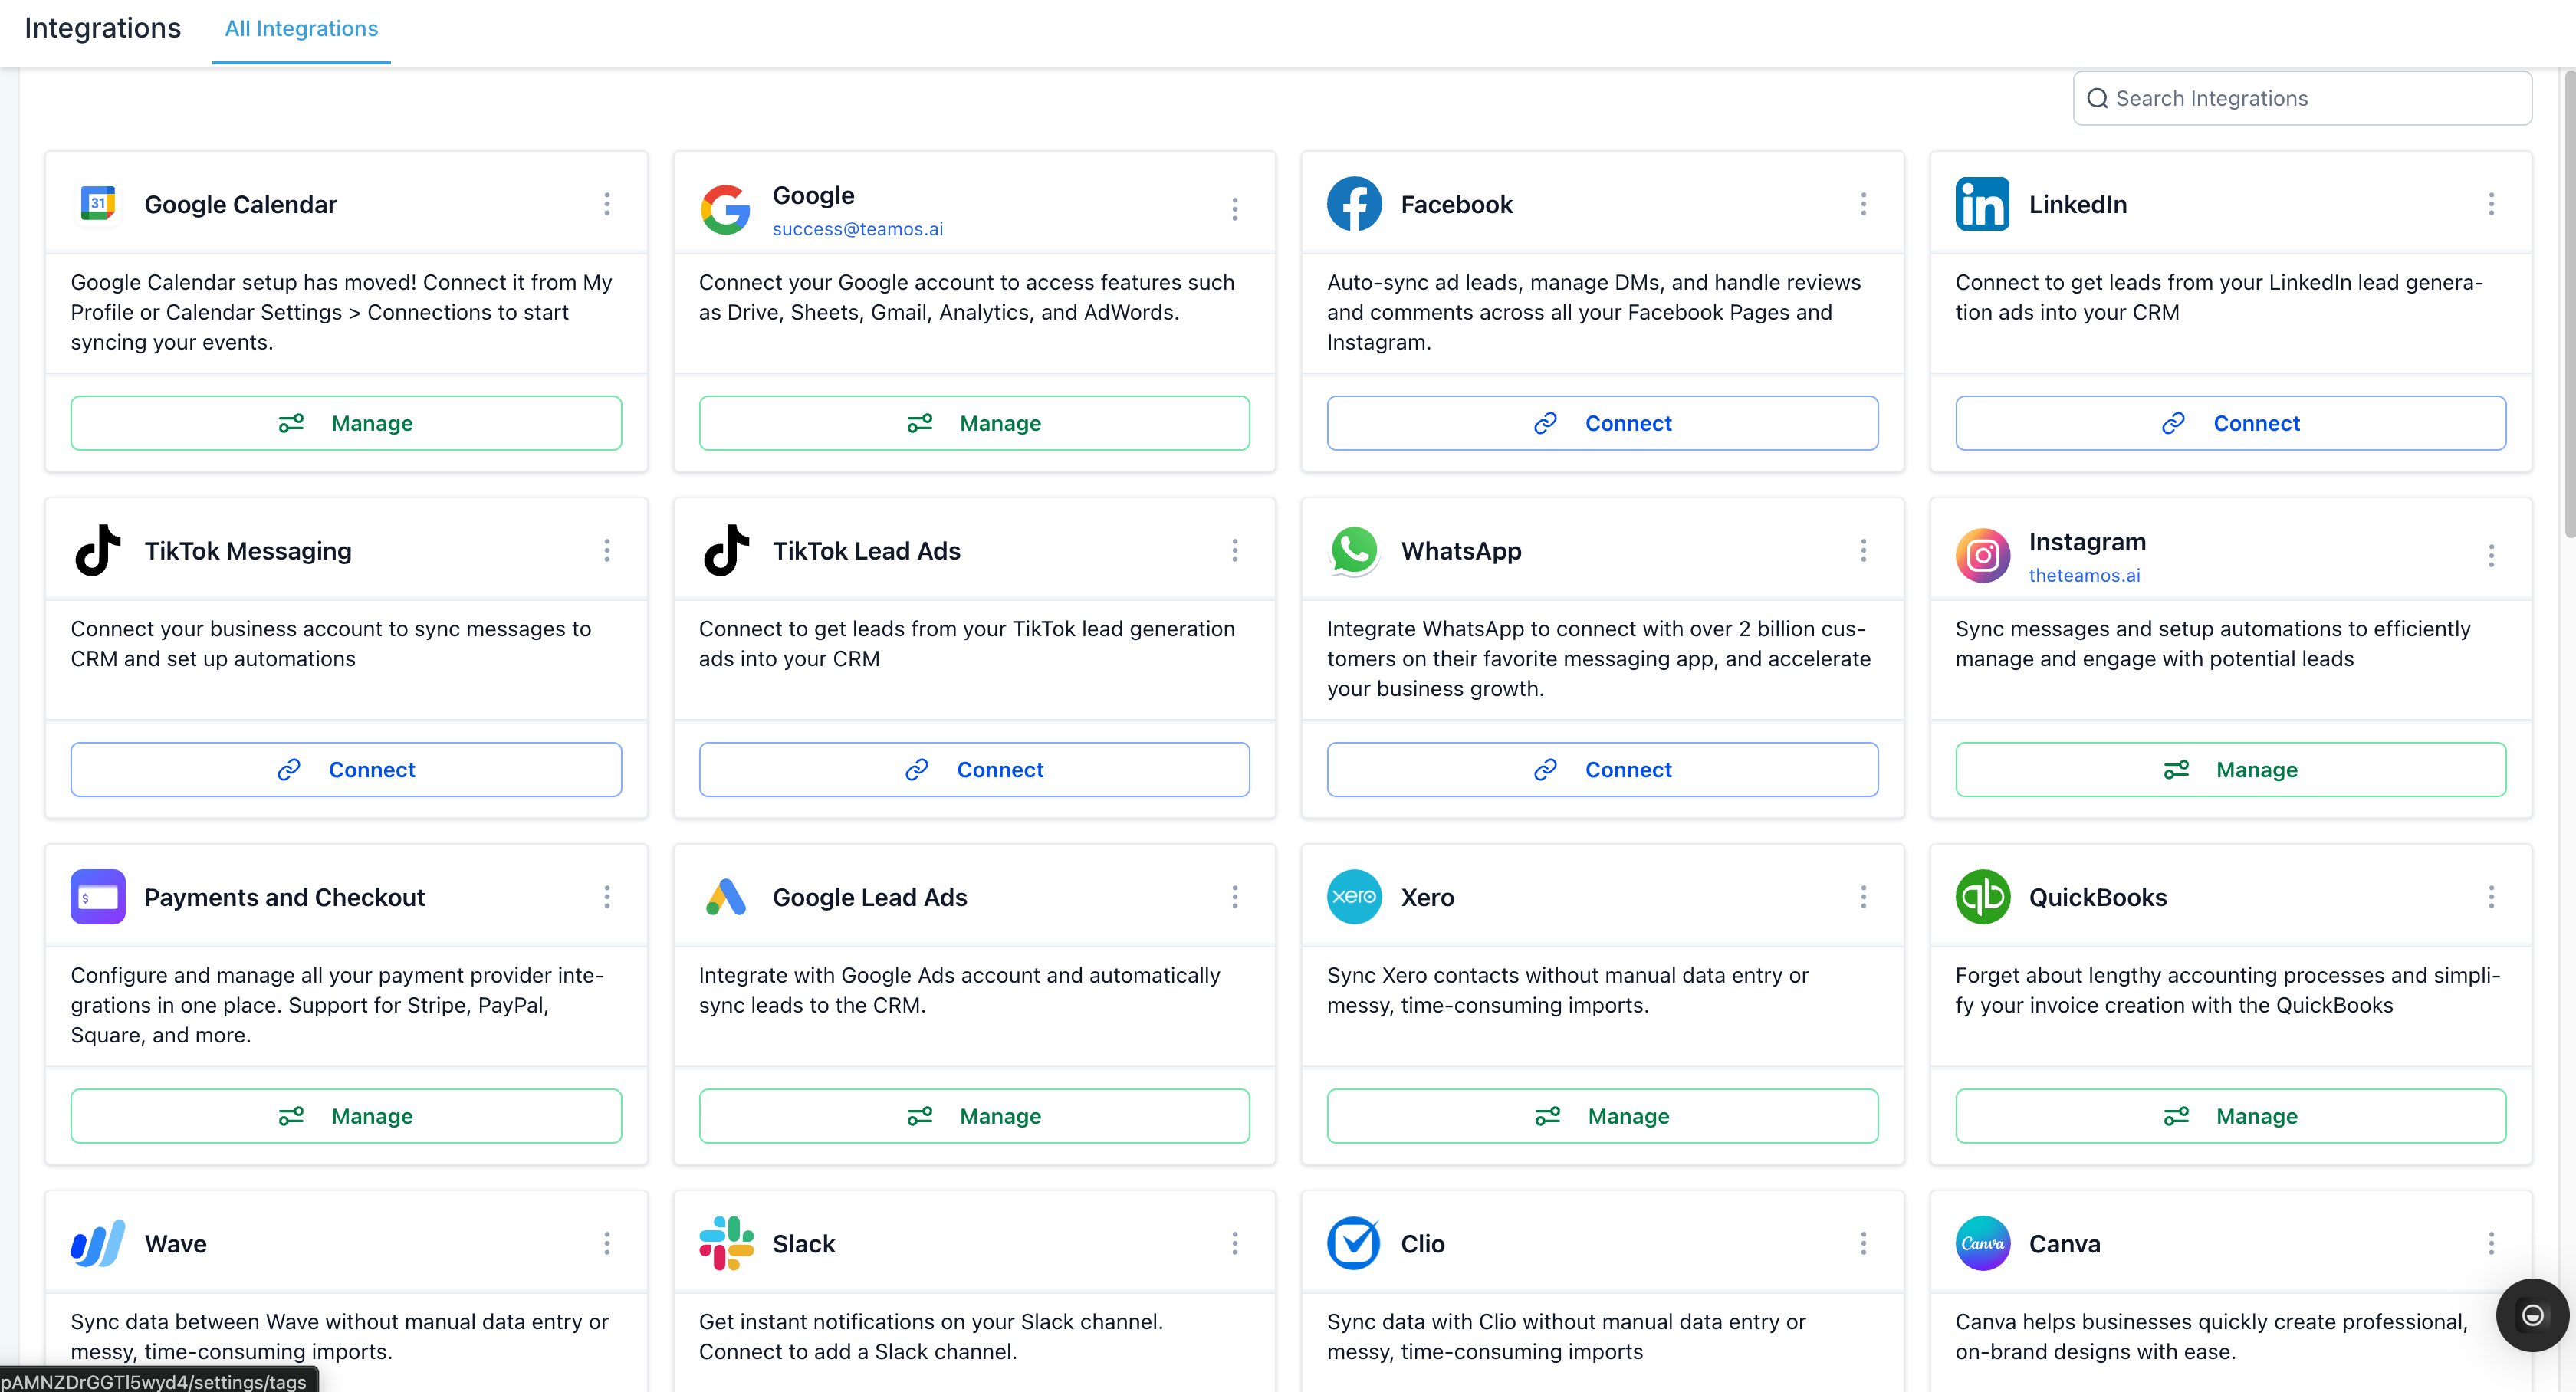
Go to Settings → Integrations. Each integration appears as a card. If an integration is not connected, click 'Connect' to begin the setup process.
Step 2: Connect an Integration
You'll normally be asked to log into the platform, select the account you want to use, approve the requested permissions, choose any pages or profiles to connect, and complete any additional configuration.
Step 3: Manage Connected Integrations
Once connected, the button changes to 'Manage'. Use this to view or change the connected account and its settings. Some integrations support multiple connected accounts — click Manage to add another, select a primary account, or remove one.
Step 4: Use the Three-Dot Menu
Some integrations have a three-dot menu with additional options: Settings, Manage Accounts, Form Mapping, Troubleshooting, Reconnect, Disconnect, and Support Documentation.
Step 5: Connect Google
Connect your Google account to enable Google Business Profile, Google Lead Ads, Google Drive, Gmail, and Google Calendar. Make sure you connect the Google account that has access to the business resources you need.
Step 6: Connect Facebook & Instagram
Connect Meta to bring Facebook and Instagram functionality into your account — Facebook Lead Ads, Pages, Instagram accounts, Messenger, and lead syncing. After connecting, make sure the correct Facebook Page is selected. For Facebook Lead Ads, map the Facebook form fields to your contact fields (e.g., Facebook 'Email' → OS 'Email').
Step 7: Connect Google Business Profile & QuickBooks
For Google Business Profile, sign into a Google account with access to the correct Business Profile, then select the business location. For QuickBooks, connect to sync customers, invoices, payments, and sales receipts — some data can sync in both directions depending on the feature.
Step 8: Search & Manage Accounts
Use the Search bar at the top to quickly find an integration by name instead of scrolling. Click Manage on any integration to view connected accounts, add another account, select a primary, change settings, reconnect, or remove an account.
Step 9: Troubleshoot & Reconnect
If an integration stops working, check the card first. Common issues include expired authorizations, changed permissions, wrong accounts connected, and unmapped form fields. Use Settings → Integrations → Find Integration → Manage / Three-Dot Menu → Troubleshoot or Reconnect. When reconnecting, log into the correct external account and approve all required permissions.
Common Mistakes
- Connecting the wrong external account and approving permissions before checking which account you're signed into.
- Forgetting to map Facebook Lead Ads form fields to your contact fields, so leads never sync properly.
- Not selecting the correct Facebook Page after connecting Meta.
- Leaving an integration disconnected after an authorization expires instead of reconnecting it.
- Confusing payment integrations (managed under Payments → Integrations) with general account integrations.